Monday, January 14, 2013

Creamy Pasta


I found the recipe for this sauce attached to a casserole dish. The casserole was not something I would rush to make again, however the sauce seemed to be good to keep on hand. Simplicity is what staples are made of. Especially since this is made of ingredients that almost anyone would have on hand at all times.

This recipe is enough to pair with a half pound of pasta.

Sauce:
  • 1/2 cup butter
  • 1/2 onion, diced
  • 2 cups milk
  • 1/2 cup flour
Melt the butter and saute onions. Once onions are soft, add milk. Stir in flour slowly. Bring to a boil, then remove from heat.

Tossed together with some cooked pasta and any variety of veggies, this is a great weeknight dinner. I managed to make the sauce within the time it took to make the pasta. The corn and peas you see were frozen and added to the sauce right before the milk. Sophia loved this, however I did find it to be a bit bland. Next time I will play around with it some by adding garlic or herbs.

Monday, January 7, 2013

Meal Planning


I am pretty much addicted to facebook. As a single mom, I would not be able to keep up with most of my friends without it. Also, since I do not have cable, it also tends to serve as my news source. Don't worry. I do research any topics that I have interest in before deeming it credible. Another reason I love facebook: it allows me to filter out much of the main stream interest groups so I can focus on my own green-foodie-frugal sentiments. One of the granola paged that I "like", Whole New Mom occasionally posts free e-books, which cater to the lifestyle I try to live. Two of my favorite scores from her page were a guide to raised bed gardening and a guide to meal planning. Hopefully, I will be successful with a garden when the weather gets warmer. I will tell you all about it then, but right now meal planning has been the latest experiment in my home. Meal planning seemed to fit right in with my green-foodie-frugal ways. It eliminates food waste, while keeping me creative in the kitchen and finding ways to make all items count before I buy more. For the most part, my meals have been planned out for the past two months and I don't think I will ever go back to spending my days at work trying to put together that night's meal.

Having a meal plan takes so much stress off your day. I don't know about you, but I am a planner, always have been. I like having a schedule and knowing what is going to happen next. As much as I'd love to be a spontaneous, fly off the seat of my pants kind of gal, I'm not. If I have a plan, that means I have one less thing to think about. It is only natural that I would stumble upon planning out my meals.

Having a meal plan also takes stress off your wallet. By actively thinking about what is already in your home, you create less of a need for more stuff. No longer will you have to wander around a supermarket grabbing staples that you bring home and try to piece together into something appetizing. By meal planning, you create the puzzle at home and only need to go out and pick up the remaining pieces, if there are any. The first time I tried meal planning, I was sold when my grocery bill was only $28! Especially since I hadn't been shopping in over two weeks!

There are many ways to plan out your meal. The free guide I downloaded listed at least four methods: weekly, biweekly, monthly, and seasonal. My meal plans have mainly been on a weekly basis. Once I managed to do biweekly, because I was trying to make it through to my next CSA pick-up. It was pretty awesome having that much planned and out of the way. Right now, a biweekly schedule would work best for me because my winter CSA pick ups are every other week. Once the weather gets warmer, I will have to cut it back down to weekly since I wont be knowing what my fridge looks like until a day or two before the pick up.Weekly and biweekly plans can be run basically the same way. It all depends how often you want to go shopping.

It pretty much boils down to doing inventory and putting the pieces together. The whole process can take up to an hour. I started a simple binder filled with loose leaf paper and I work with two pages open in front of me. On the left page, I make three columns: Cabinets, fresh/fridge, freezer. Then, I list everything. EVERYTHING. The most emphasis will go towards what you have in your fresh/fridge column. The idea is to use up anything that may go bad first. When making my inventory list, I like to put stars next to the most perishable items. That way I can plan accordingly to eliminate waste.

Next I sit down and create a calendar with the right page. Usually three lines per day, so I can name the meal, list out what on hand ingredients I will use, and then list the ones I need. As the calendar comes together, I will also write down tasks for each day. This usually consists of prep work that can be done the night before, such as taking meat out of the freezer to thaw or chopping veggies.

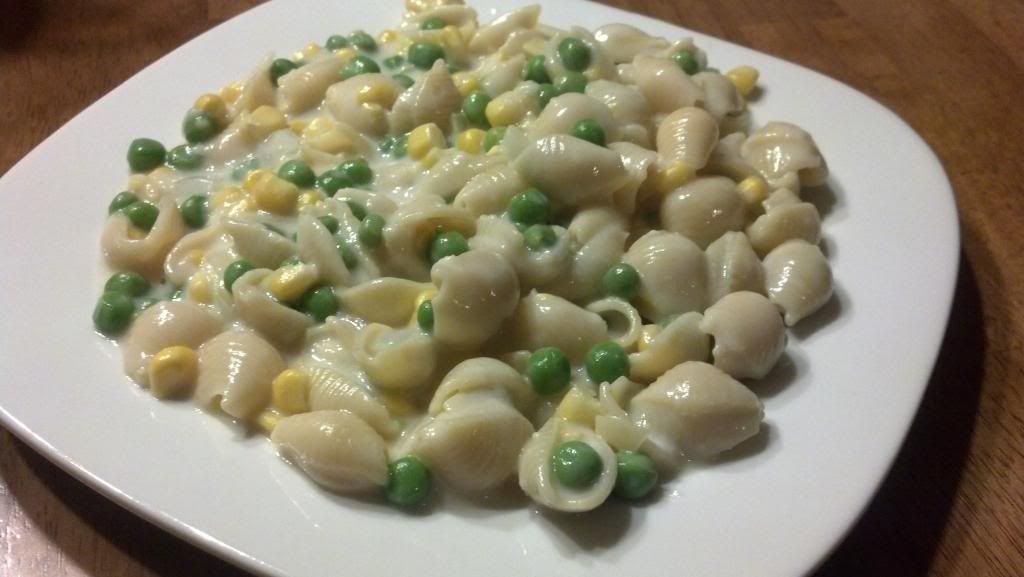
Some meals come to mind almost instantly. Others not so much. Sometimes it helps to put themes into effect. I don't do this everyday, but it does help when you get stuck. Mondays are obviously meatless. Tuesdays are usually always crock pot dishes, because we need to be changed and fed within an hour to get Sophia to dance on time. Wednesdays will be a larger meal because it is a night home. Thursdays tends to be a leftovers day or I will cook a second meal on Wednesday to have Thursday, since Sophia has another night of dance and we go directly after school. Friday, Saturday, and Sunday are always free days. I plan them out, but there is no rhyme or reason. I just follow where my ingredients lead.

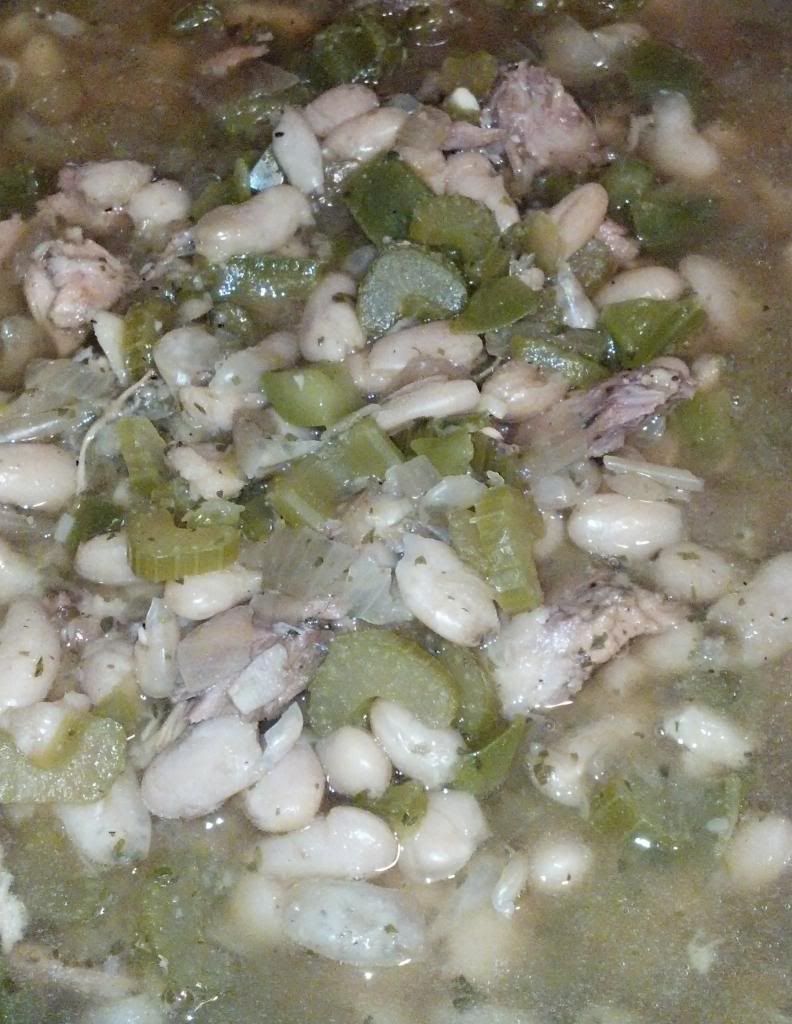
Another useful tool is Google. I've said it before, Google is my favorite cookbook! You may have some odd and end ingredients that you have no idea what to do with...Google them together! A search of "steak beans mustard" may actually surprise you. I just came up with that combination off the top of my head, but I googled it and came up with a recipe for beef with black beans and rice. There are so many dishes out there using what is already in your kitchen if you just take the time to find them! Stop spending your money on things you don't even realize you already have.

After my calendar is all filled out, I create my shopping list of only what is needed for my meals. Maybe once a month I will do a big trip to replenish the staples, such as pasta and beans. It has been working out that my weekly grocery bill, if I even need to go at all, stays under $30. It is really helpful to my budget to be able to stay well under $150 in groceries per month. I suggest you give it a shot. An hour of planning may seem a lot, but time is worth money and you will be saving a lot of that!

Sunday, January 6, 2013

"Monday" Beans and Chicken


This is a recipe that I sat on for a while. I have no idea where I found it, but I really liked the story, so I copied it into my recipe notebook. Then I promptly forgot all about it. So months later....

While I was doing last week's meal plan, I knew I was going to use the local, free range, and organic chicken thighs that I received from my Greensgrow Farm winter CSA. Since this meat was such amazing quality, I had to make sure I used it to its full advantage. Normally I would make stock from chicken bones, but the story of Monday beans and chicken randomly popped into my head. I love when great food ideas strike! Only problem: I could not seem to remember where I found the recipe. I googled it for days to no avail. I could find the story, but no recipe. Finally I remembered that I had written it down in my book. I would seriously lose my head if it...actually, I think sometimes I do.

The name of this recipe derives from an old Southern tradition. On Sunday nights, families would sit down together for a nice dinner of either or ham. Any leftovers, including bones, were thrown into a pot of beans on Monday. This pot would slowly cook on the stove through the day, while the women would spend the day doing laundry. Sometimes this dish is called Laundry Day or Wash Day Beans.

Obviously, I cannot enjoy "Monday" beans and chicken on a Meatless Monday, but I do like it's logic. I think this is a great idea for Sunday dinner. I prepared a quick and easy dinner of roasted chicken thighs on Saturday night and then let this dish cook in the Crock Pot, while I attempted to get a handle on the remaining Christmas mess. Thankfully the dinner was much more successful than my attempts at being productive.

  • 1lb beans, whichever type you chose - soaked overnight
  • 1lb leftover (cooked) chicken or ham with the bones if you still have them
  • 1 bell pepper, chopped
  • 1 onion, chopped
  • 3 celery stalks, chopped
  • 2 Tbsp Parsley
  • 1 Tbsp ground black pepper
  • pinch cayenne pepper
  • 2 cups water
  • 1 Qt Broth
  • 2 bay leaves
Place all ingredients in Crock Pot. Be sure broth and water covers meat and beans. Add more water, if needed. Cook on high for an hour, then set to low and continue to cook for 7 hours. Remove bones and bay leaves. Serve as soup or over rice.

As always, I went a little off recipe. That always seems to happen, according to what I have on hand. Better to use what you have than let it go to waste, just because you went and bought something else. I used a little over half a pound of white beans and I couldn't tell you the exact weight of the meat that was used. It wound up being the meat off two thighs and four thigh bones. Surprisingly, that gave me a decent amount of meat in my final product. This recipe really does lend itself to variety, since you can switch up your beans and types of meat. I will be definitely be trying many different variations in the future. I would recommend only using the larger bones if you are using a chicken, so you can pull them out easily.

Either because I went off recipe with my amount of beans or because this is a southern meal, but this meal is hot! It was way too spicy to even attempt to feed to Sophia. Luckily, I had some odds and ends of leftovers that she could eat for dinner. While it was super spicy, it was not too overpowering for me. So if you don't like it hot, try and cut down on the amount of pepper OR be sure to have a large glass of water and a piece of bread to go alongside your meal.

Saturday, November 24, 2012

Root Soup


This recipe started out as my own idea for how to cook potato soup, until I remembered the abundance of radishes and turnips that I have built up from my CSA. I decided to toss some of those into the mix as well. Especially since they are kind of my problem products. Good thing they keep! The turnips aren't too much of an issue, but I received so many damned radishes this season! I am not entirely complaining, but I really don't have many ideas how to use them up.

 The result was a very hearty blend meant to heat up those seasonable winter nights.

  • 2 carrots, sliced
  • 3 stalks celery, diced
  • 1 onion, diced
  • 5 potatoes, peeled and sliced
  • 2 turnips, peeled and sliced
  • 2 radishes, peeled and sliced
  • 5 cups vegetable broth
  • 1 clove garlic
  • 1 Tbsp olive oil

Heat olive oil in the bottom of a large pot. Add carrots, celery, and onion. Saute until fragrant. Add potatoes, turnips, radishes, garlic, and broth. Bring to a boil, then reduce heat to low and simmer for 30 minutes. Transfer to a blender in batches, CAREFULLY! Season with salt, pepper, and maybe a little paprika.

The color was not the most appealing, but the soup was very satisfying. It was really a very filling soup. Unfortunately I cannot give you Sophia's opinion. She was sick with a stomach virus the day I made this soup. She had intentions of eating, but once I had the soup in front of her the belly started acting up and she was unable to eat. My poor baby only ate half a slice of toast and a few apple slices all day long! That was really hard to watch.

The only gripe I have about this soup is how it holds. It was a nice smooth consistency the day I made it, but it thickened after refrigeration. It was still pretty delicious. Maybe I will need to add some broth or water to the leftovers before heating next time I make this. I will definitely be making this again, since it pretty much uses staples that have constantly been in my fridge this fall. Another great aspect of this meal is every single ingredient was acquired through my CSA! Even the broth was mainly made up of CSA scraps, so I definitely got my monies worth!

Wednesday, November 14, 2012

Pumpkin Orzo


This post is going to be short and sweet. Mainly because I promised a friend I would post it before Thanksgiving so she could make it as a side and I am pretty much getting down to the wire. Can you believe Thanksgiving is a week away?? I have no idea what I will be cooking for the big day. Of course I will be making pumpkin pie, but I don't now what other sides I should offer up to the table. Any ideas?

  • 1 cup Pumpkin Puree
  • 1 can cream of mushroom soup
  • 2 stalks celery, diced
  • 1 green pepper, diced
  • 1 lb orzo, cooked according to package directions
  • 1 tbsp cinnamon
Heat a little bit of oil in a skillet and add the celery and peppers. Saute until soft, then add the soup and pumpkin. Bring to a boil, then turn the heat down low to simmer. Add cinnamon and simmer for 20 minutes to let the flavors blend.
Fold into the orzo.

This dish is best served immediately. The orzo will absorb the sauce if it becomes leftovers. Still delicious, but it looses the desired texture and taste.

Thursday, October 11, 2012

Pressured Beans

I am not a professional photographer. Obviously. Some days I am only lucky enough to get the lighting correct to properly portray the food. Take it as my guarantee that this is real; made and eaten in my own kitchen.

If there is anything that could be able to convince someone to invest in a digital pressure cooker, this is IT! Even after owning mine for almost two years, I still get amazed at the abilities of this little guy. Sure it can create meals, such as soup and meat, in minutes as opposed to hours, but when it can cut out overnight prep work plus hours of cooking - that is something!

During this summer, my interest in using dried beans soared. For about two weeks. I found bags of dried beans on a clearance rack, so I scooped them up. Those bright red price tags sure do catch my eye and get my mind reeling with ideas. At such a low cost, I was sure to find uses for the pinto, black, and white beans I impulse bought. Shortly after, I found a recipe to cook and can pinto beans so they are ready to be mashed and (re)fried Mexican style. Unfortunately, this was a total fail! I wasted 9 pints of beans because most of the liquid escaped from the jars while processing. Being such a dried bean novice, I had no idea how to save my poor little pintos. Not too long after that, there was another horrible bean episode. After hours of soaking and cooking, a whole pot of escarole soup went down the drain. Wasted, because the beans had refused to transform from hard little pebbles to soft buttery beans. Needless to say, I was a bit discouraged from the whole bean adventure. My remaining dried clearance beans spent the rest of the summer hanging out in the cabinet, untouched. Good thing they have a super long shelf life!

This week, I began a new kitchen journey. As I explained in my last post, my life has become so busy, that planning seems to be the only way for my frugal and (somewhat) healthy lifestyle to survive. Sunday, I took inventory of everything that was in my kitchen. The objective is to use up what you have on hand instead of purchasing items you don't really need. With this inventory, you can make up meals using mainly what you already have. A shopping list can be made according to the few ingredients you may need to tie together your upcoming recipes. I managed to only spend $27 at the grocery store this week!

One of the items I needed was black beans. Monday's meal was stuffed sweet potatoes, which calls for a can of beans. I had the choice to go out and buy a can of beans or finally get the courage to make another attempt at the dried beans in the cabinet. Since the main point of this meal planning exercise is to: use up what I already have and to avoid spending extra money; I really could not justify buying some canned black beans.

A bonus of this meal planning is knowing what needs to be prepped ahead of time. By planning Monday's meal on Sunday, I had time to soak the beans and then cook them. The main reason most people use sodium packed canned beans is because it takes too damned long to prep the dried beans. Like most of today's unhealthy lifestyle habits, it boils down to convenience. Enter the Pressure Cooker - Convenience Maker! Once I decided to use the dried beans, I had to google how to properly prep and cook them. Within five minutes, I found a website with instructions for pressure cooking beans. Since one the things hindering me from using dried beans was the amount of time to prepare them, you can imagine how excited I was! I popped right up and grabbed my pressure cooker cookbook, Slow Food Fast. True to its name, this cookbook contained a chart for cooking unsoaked beans within mere minutes! All you have to do is cover the beans with water, add 2 Tbsp oil to prevent foaming, then cook on high for the recommended amount of time according to the specific bean.

Bean cooking time in minutes:
  • Black beans - 20
  • Black-eyed peas - 8
  • Cannellini - 35
  • Garbanzo/chickpeas - 35
  • Great Northern - 25
  • Kidney - 22
  • Lentils, green - 8
  • Lentils, red or yellow - 4
  • Lima - 12
  • Navy - 20
  • Peanuts, raw - 60
  • Pinto - 22
  • Scarlet Runner - 16
  • Soy - 28
  • Split Peas - 6
Just be sure not to fill the pressure cooker more than half full.
One cup of dried beans should make approximately 3 cups of cooked beans.

Twenty minutes as opposed to hours upon hours of cooking is much more do-able. It may take longer than simply opening a can, but it totally makes up for it when you consider the health benefits of lower sodium intake, the significant lower cost, and the reduction in consumer waste - especially if you buy from bulk bins. This is definitely the way to go!

Sunday, October 7, 2012

Kraut


One of these days, I will be able to begin a blog post without feeling guilty and obligated to explain why it has been so long since I last posted. It definitely is not for a lack of cooking. I cook my ass off! It gets to the point that I cannot physically keep up with the amount of dishes that come hand in hand with my delicious hobby, even with a dishwasher! I've been trying to pin down one specific reason for my lack of posts. Truthfully there are a handful of reasons, but if I had to sum it all up: I am TIRED!

I began a new job a few weeks ago. It pays better than my last job, but has me feeling drained. My alarm is set for an hour earlier in the mornings than I am used to, which means I need to get to bed an hour earlier each evening as well. Since I am not a morning person at all and totally a night owl, this basically means I lose an hour in my day. As if I had an hour I could spare! This blog is not the only thing that has suffered due to this job, so don't feel too abandoned. I have not been working out at all! Luckily, by eating fairly healthy, I have managed to stay around the same weight that I reached when I was working out regularly. Unfortunately, it has settled and looks much different. Muscle definitely weighs more than fat!

Sophia started kindergarten this year! Plus, dance classes started the very same week as school. She will be doing two nights of dance this year, which means two nights of being out of the house around dinner time. I really want to avoid the drive thru on those nights as much as possible, which means I need to get into the habit of planning. Now I need to think ahead and make large dinners that will provide leftovers or cook two meals on Mondays and Wednesdays to have a quick heat up meal on dance days. My life looks so different than it did this time last year, when I started this blog. Well, except for the fact that I am completely single. That hasn't changed and doesn't look like it will be anytime soon.

So now that I have caught you up with whats been going on with me (and vented a smidge), it is time for the kraut. With this CSA, I have had more cabbage than I knew what to do with. Not that the farm had an over abundance of a cabbage crop, but I never really cooked with cabbage before so I had some recipe searching to do. Luckily cabbage heads keep well in the refrigerator.

I was interested in making my own sauerkraut, but every recipe I found involved a 5 gallon bucket, a large plate, and months worth of fermentation. It is not unusual to find my house smelling like whatever I've been cooking, but the smell of fermenting kraut sticking around for months could really get old. A new friend of mine shared her recipe for small batches of kraut. Thank goodness! Even if I could handle months of fermentation smells, what would Sophia and I ever do with gallons of kraut?

- 3 to 4 small heads of cabbage or 1 to 2 large heads
-salt

Shred your cabbage. If you are like me, working without one of those fancy Kitchen-Aid do-hickeys, this is a rough process. Watch your knuckles! Once all the cabbage is shredded, begin layering it with the salt in a large bowl. One layer of cabbage, one generous layer of salt. Continue to layer until all cabbage is in the bowl. Let sit for 30 minutes to an hour. The salt will pull moisture out of the cabbage. Once there is a puddle of water collecting at the bottom of your bowl, it is time to transfer to jars. I managed to put all my kraut into one wide mouth mason jar. I recommend a jar with a wide enough opening to fit your hand inside.

Transfer your cabbage and its liquid into your jar, pressing down firmly after every couple scoops. There should be enough liquid to cover the cabbage once the jar is filled. If not, add some water. Shut the jar and place in a dark cabinet for a week to 10 days. Check your jar every few days and rinse any scum that collects on the lid. Be prepared for some fun odors to come rushing out of your jar the first time you open it. Don't say I didn't warn you! The smell was so strong, it chased my sister out of my apartment. Start taste testing your kraut at about 7 days. Once it is to your liking, transfer the jar to the fridge.

Now instead of buying those bags or cans of slop, you have your own kraut to add to pork chops, hot dogs, sausage, or any other dish you see fit. This past week, I baked some with turkey sausage and apple slices. Very delicious!